 Skip to content
Change your furniture with rattan webbing! I recall the first moment trying it; the change felt magical.
Attaching rattan webbing to a table top uses different techniques. These methods keep the table looking nice and strong. Key techniques involve staples, glue or upholstery tacks. Each option offers unique benefits. Your choice depends on project needs. In my experience, selecting the right method really changes the final look. A stunning finish might depend on this choice.
Attaching rattan webbing to a tabletop often feels like creating art. I discovered many methods. These not only add beauty but also help the piece last longer. I sometimes used staples for a quick solution. Glue provided a smooth look. Upholstery tacks gave a traditional style. Each method worked wonderfully. Now, let’s explore these techniques more!
Rattan webbing can enhance furniture aesthetics.True
Using rattan webbing improves the visual appeal of furniture, adding a unique texture and style.
Glue is the only method for attaching rattan webbing.False
While glue is one method, staples and upholstery tacks are also effective options.
What Tools Do You Need for Attaching Rattan Webbing?
Are you getting ready to add rattan webbing to your furniture? The right tools are very important. They help your project become a success. You might see more craftsmanship in your home.
To attach rattan webbing well, people need a wooden stapler, a nail gun, a utility knife and screws. Tools like these help keep furniture strong and long-lasting. The furniture becomes durable.
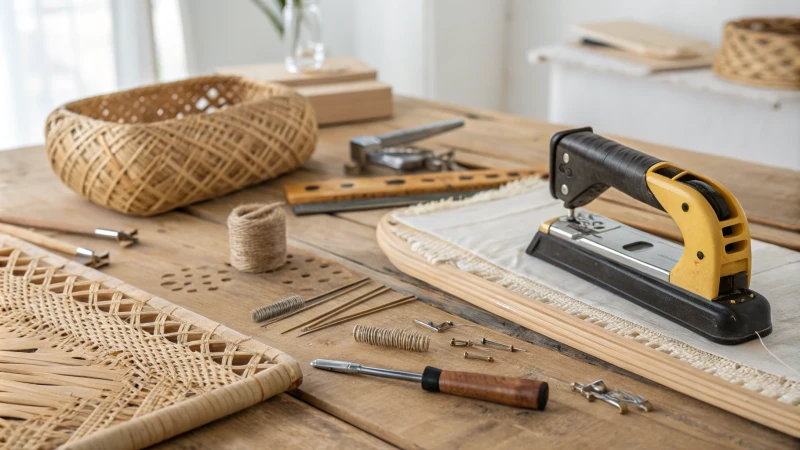
Essential Tools for Attaching Rattan Webbing
Attaching rattan webbing requires a specific set of tools that ensure both durability and aesthetic appeal in your furniture projects. Here’s a breakdown of the essential tools you’ll need:
| Tool | Purpose |
|---|---|
| Wooden Stapler | Used to secure the webbing onto wooden frames easily. |
| Nail Gun | Provides a quicker and more efficient means of fastening. |
| Utility Knife | Essential for cutting the webbing to the required lengths. |
| Screws | Used to anchor the webbing in place for added strength. |
Each tool plays a vital role in ensuring that the rattan webbing is firmly attached and can withstand wear over time.
Detailed Insights on Each Tool
Wooden Stapler
A wooden stapler transformed my work. It gave a strong grip and avoided harm to the rattan webbing. Choosing staples felt like picking the right accessory for an outfit. Staples need to be the right size. For different types, look at stapler options1.
Nail Gun
For bigger tasks, the nail gun was the most important tool. It made the work really quick, allowing me to be more creative. Using it right is very important to avoid ruining the webbing or frame. For safety tips with nail guns, see safety guidelines2.
Utility Knife
A sharp utility knife was really important for cutting rattan webbing accurately. Clean cuts changed the look beautifully. For knife care, check out knife care tips3.
Screws
I learned screws gave extra strength, especially in high-stress areas. Choosing the right screw length was very crucial; different screw types helped me choose wisely. See them at screw varieties4.
Preparing Your Workspace
Before starting my projects, preparing my workspace was important. Having enough room and keeping tools nearby improved my efficiency greatly. A tool organizer kept my area tidy and accessible.
Tips for Effective Use
To use these tools well, here are strategies that helped me:
- Practice on Scrap Materials: Practicing on leftover materials increased my confidence.
- Use Clamps: Clamps kept pieces still while I stapled or nailed.
- Follow Manufacturer Instructions: I always read tool guidelines for best practices.
Understanding these tools made professional-quality results in my rattan webbing projects possible. For more tips on DIY furniture restoration, visit DIY furniture tips5.
A wooden stapler is essential for attaching rattan webbing.True
The wooden stapler secures the webbing onto frames without damaging it, ensuring a strong hold.
Using screws is unnecessary for rattan webbing projects.False
Screws provide added strength and security in high-stress areas, making them essential for durability.
What Techniques Are Best for Different Types of Furniture?
I first ventured into the world of furniture design. I quickly saw that each item shares its own tale. Crafting techniques show this story very clearly. Let’s discover these special methods together!
Different types of furniture need specific techniques. These methods depend on the materials and purposes. Upholstered pieces need unique upholstery methods. Wooden furniture depends on joinery skills. Each piece must look beautiful and work well. Each piece is very crafted.
Understanding Techniques for Different Furniture Types
During my journey in furniture design and making, I learned that different methods suit each type of furniture. Every type has special traits and needs specific ways to show off its beauty and use.
Take upholstered furniture, for example – sofas and chairs that feel very welcoming after a long day. The methods used here are really interesting:
- Frame construction: Starting with a strong hardwood frame is important. It gives the furniture strength and long life.
- Upholstery: Picking the right fabric or leather really matters. Various sewing and stapling techniques can change how the piece feels.
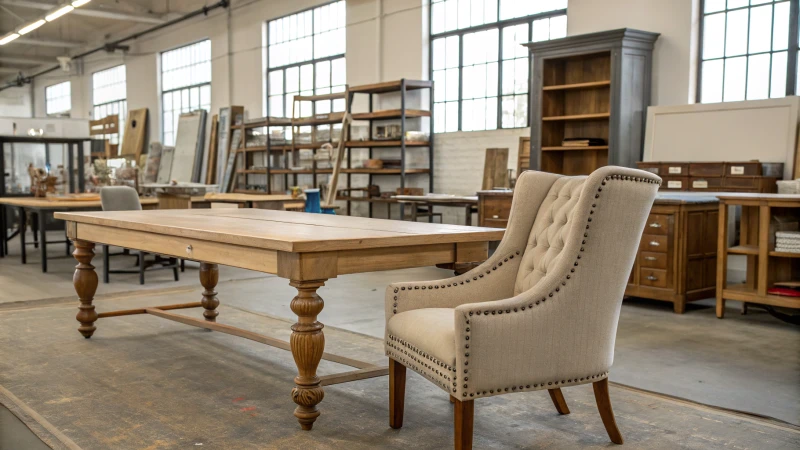
On the other hand, wooden furniture like dining tables or cabinets shows the art of working with wood:
- Joinery: Techniques like dovetail or mortise-and-tenon joints offer strength and highlight skilled work.
- Finishing: Stains or varnishes bring out the wood grain. This changes a rough piece into something special.
Techniques for Rattan Furniture
My love for rattan furniture introduced me to unique methods that show the natural beauty of rattan. Here’s what I found:
- Weaving: Patterns like herringbone or basketweave look beautiful. They also affect strength and durability.
- Framing: A strong frame is very important to hold the fine yet flexible rattan strands.
| Furniture Type | Key Techniques | Example Styles |
|---|---|---|
| Upholstered | Frame construction, Upholstery | Sofas, Armchairs |
| Wooden | Joinery, Finishing | Dining tables, Cabinets |
| Rattan | Weaving, Framing | Chairs, Room dividers |
The Importance of Technique in Design
Knowing these techniques has become important in my job as a procurement manager. The technique chosen doesn’t just affect strength and cost; it affects how a piece connects with people. For instance, I noticed that using green methods in rattan weaving probably makes products more appealing to eco-friendly buyers.
Exploring new techniques is something I really enjoy:
- Mixed Materials: Blending rattan with metal or glass creates exciting new modern designs.
- Green sourcing: Using earth-friendly materials not only feels good but might also draw more customers.
On this journey, I stay committed to learning new methods that help me follow market trends and buyer likes. Picking the right materials requires knowing which techniques fit various designs best. This guides me in choosing the right suppliers.
For those wanting to learn more about furniture techniques, furniture craftsmanship6 resources are invaluable. Also, looking into sustainable practices7 can lead to smarter choices in procurement that match industry standards and buyer needs.
Upholstered furniture uses unique sewing techniques for durability.True
Upholstered furniture requires specific sewing methods to ensure the longevity and strength of the fabric or leather used in its construction.
All furniture types utilize the same manufacturing techniques.False
This claim is false; different furniture types require distinct techniques tailored to their materials and design requirements.
What Common Mistakes Should You Avoid When Working with Rattan Webbing?
Rattan webbing turns a simple piece of furniture into a stunning centerpiece. Mistakes probably happen if you’re not careful. I learned this the hard way. Avoiding these common errors really matters for the success of your project. Let’s explore what to be careful about together!
When working with rattan webbing, stay away from usual errors. People often skip proper preparation. Material quality is important and should never be ignored. Environmental factors affect the process and need careful consideration. Using the wrong installation methods leads to problems. Ignoring regular care and maintenance causes damage over time. Consider these important points. Projects really last longer with attention. Projects also look better.

Understanding Rattan Webbing
Rattan webbing ranks among my favorite materials for furniture due to its unique charm and strength, which really increase a piece’s appeal. However, I often encounter challenges when using it. With time, I discovered that avoiding common mistakes is important for achieving beautiful and lasting results.
1. Neglecting Preparation
Preparation is crucial! I once started a project too quickly and ended up with uneven cuts and a big mess. Properly preparing your rattan webbing involves measuring, cutting, and treating the material to enhance its durability.
- Tip: Always measure twice and cut once to avoid waste.
- Pre-treatment: Applying a sealant beforehand helps prevent moisture damage.
2. Ignoring Material Quality
Not all rattan webbing is the same, and I learned that the hard way too. Choosing reputable suppliers changed my work. High-quality material meets my standards.
| Quality Indicator | Description | Importance |
|---|---|---|
| Material Source | Look for sustainable sources. | Eco-friendliness. |
| Thickness | Ensure uniformity in thickness. | Structural integrity. |
| Finish | Smooth finish reduces wear. | Aesthetic appeal. |
3. Underestimating Environmental Factors
I installed a beautiful piece that warped in a humid room. Rattan reacts to humidity and temperature changes; failing to account for these can lead to warping or cracking.
- Tip: Store rattan in a stable environment to protect it.
- Consideration: The project location might affect the rattan over time.
4. Improper Installation Techniques
Weak joints and loose weaves happened because I was too eager to finish. Using incorrect techniques can lower furniture quality; tightening mistakes can break or sag rattan.
- Common Techniques to Avoid:
- Over-tightening causes rattan to break.
- Under-tightening leads to sagging.
5. Forgetting Maintenance
It’s easy to overlook that regular care is essential! Rattan needs attention even after installation; periodic cleaning and treatment keep my pieces vibrant.
- Maintenance Tips:
- Clean with a damp cloth regularly.
- Apply oil or wax every few months for shine and durability.
Resources for Learning More
If you’re really eager to learn best practices and avoid mistakes with rattan webbing like I did, consider exploring advanced techniques8 or consulting expert guides. Let’s keep learning together!
Skipping preparation can damage rattan webbing projects.True
Proper preparation is crucial for the durability and quality of rattan webbing, avoiding mistakes like improper cutting or treatment.
High-quality rattan webbing is always sourced from local suppliers.False
Not all local suppliers provide high-quality materials; sourcing should focus on reputable and sustainable sources regardless of location.
How Can You Ensure a Durable Finish with Rattan Webbing?
Let’s explore some proven methods. These methods help your rattan webbing look great. They also help it last for a long time!
Selecting high-quality materials is essential for a long-lasting rattan webbing finish. Proper preparation of surfaces is a key step. Suitable finishes, like polyurethane, provide strong protection. Apply these finishes evenly and in thin layers. Regular maintenance keeps the finish strong. Longevity relies on these actions.

To ensure a durable finish with rattan webbing, it is essential to consider several key factors that contribute to both the appearance and longevity of the material.
Choosing the Right Rattan Webbing
Quality starts with selecting the right rattan webbing. High-quality rattan from mature vines really matters. In my first project, I used younger rattan, which was less durable and did not last long. Now, I always choose tighter weave patterns for more strength. They are better. To learn about different rattan types, check out this resource9.
Preparing the Surface Properly
Before thinking about finishing, prepare the surface. I found out that cleaning is essential for smooth results because dust and debris ruin finishes. A light sanding can help open up the surface for better absorption of stains or sealers. Use fine-grit sandpaper (around 220 grit) for this purpose, and always wipe down with a damp cloth afterward to remove dust.
| Preparation Steps | Description |
|---|---|
| Clean Surface | Remove dust and dirt using a damp cloth. |
| Light Sanding | Use fine-grit sandpaper to smooth out imperfections. |
| Wipe Down | Ensure no dust remains before finishing. |
Selecting the Right Finish
Choosing a finish can be very exciting. I prefer polyurethane or marine varnish for water resistance and UV protection. Once, I used cheap varnish and it faded and cracked quickly. A good finish not only looks nice but also shields from sunlight and moisture damage. Read more on finishes in this detailed guide10.
Application Techniques
Precision is key when applying your finish correctly for achieving a durable coating. Using a good brush or spray gun allows for even coating. Apply several thin layers instead of one thick one, allowing adequate drying time between each layer as this technique provides better adhesion and a longer-lasting finish.
Maintenance Tips for Longevity
Maintaining your work makes it last longer; regularly inspect finished pieces for wear or damage. Clean with mild soap and water to avoid removing the finish without stripping away its protective layer. Every few years, I apply a new sealer coat to keep things fresh and protected. For more maintenance advice, visit this article11.
High-quality rattan webbing ensures superior durability.True
Using mature rattan vines increases strength and longevity, making it essential for a durable finish.
Applying thick coats of finish is better for durability.False
Multiple thin coats enhance adhesion and resilience, contrary to the belief that thicker is better.
Conclusion
Learn effective techniques for attaching rattan webbing to tabletops, including essential tools and methods that enhance both aesthetics and durability in furniture design.
-
Explore this link for comprehensive insights into various tools used in DIY projects, which can enhance your skills and effectiveness. ↩
-
This link offers safety tips specifically for using nail guns, helping you prevent accidents and improve your project outcomes. ↩
-
Learn how to maintain your utility knife effectively, ensuring longevity and optimal performance during your projects. ↩
-
Discover different screw types suited for furniture assembly, ensuring you select the right one for your rattan webbing project. ↩
-
Find useful strategies for organizing your workspace which will help streamline your DIY projects and increase efficiency. ↩
-
Discovering diverse furniture techniques will enhance your understanding and skill set in design and production, making this link invaluable. ↩
-
Learning about sustainable practices will empower you to make eco-friendly choices in your furniture projects and supplier selections. ↩
-
Clicking this link will provide you with expert insights and practical advice that will help you avoid common mistakes when working with rattan webbing. ↩
-
Learn practical tips for achieving long-lasting finishes on rattan webbing, perfect for your DIY projects. ↩
-
Understand the types of finishes that work best on rattan and how to apply them effectively. ↩
-
Find expert maintenance tips to keep your rattan webbing looking great for years. ↩
