 Skip to content
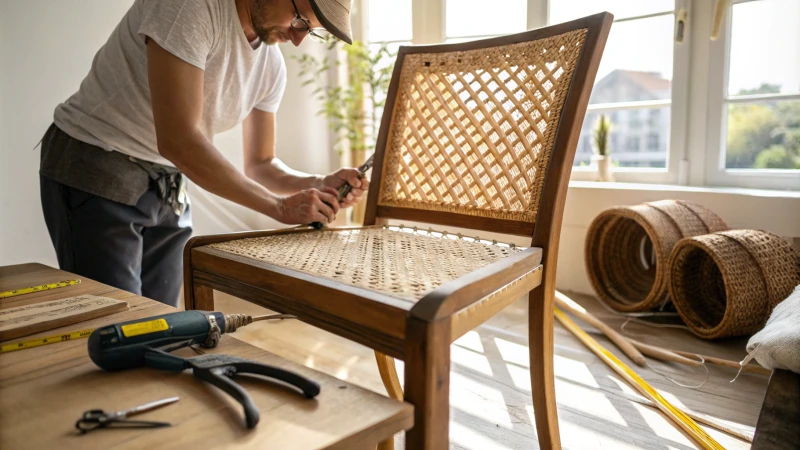
Ready to change your furniture with rattan webbing? This journey could be really exciting!
For successful rattan webbing installation, gather all needed tools first. Measure the area accurately. Prepare the surface properly. Follow clear steps. This helps create a smooth installation. This approach improves both appearance and strength.
When I first chose to work with rattan webbing, I felt both excited and nervous. It was like starting a new adventure. I collected my tools and paused. I imagined how beautiful the finished project would probably look. Accurate measurements and surface preparation were important. I wanted perfection. Following each step brought me joy. I knew my furniture would look lovely and last longer.
Gathering tools is essential for rattan webbing installation.True
Having the right tools ensures a smooth and efficient installation process for rattan webbing.
Measuring the area is optional when installing rattan webbing.False
Accurate measurements are crucial for a successful installation of rattan webbing to fit properly.
What Tools Do You Need for Rattan Webbing Installation?
Considering entering the world of rattan webbing? I recall my first project. Having the correct tools was very important. Let’s look at what tools really help in your installation!
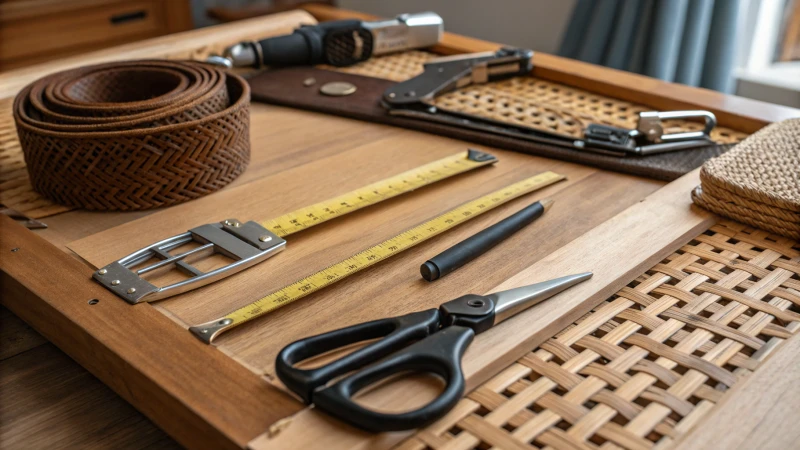
To install rattan webbing correctly, you need a few essential tools. Scissors are necessary for cutting. A staple gun helps attach the webbing securely. A measuring tape checks dimensions. Clamps hold everything in place. A rattan webbing stretcher is useful. These tools create a very strong and precise result. Safety is also really important during the project.
When I began using rattan webbing, I soon realized the right tools were essential for success. They transform a difficult task into an easy, enjoyable project. Let’s explore the important tools you really need:
Essential Tools for Rattan Webbing Installation
-
Scissors or Utility Knife
A quality pair of scissors or a sharp utility knife really makes a big difference! I once had trouble with frayed edges until I got a good utility knife. It provided cleaner cuts and helped me achieve a polished look. Learn more about cutting techniques1. -
Rattan Webbing Stretcher
This tool became my constant companion during my projects. It keeps the rattan taut and prevents sagging, ensuring a beautiful result. The first time I used one, the installation process became much smoother. Check out our guide on using webbing stretchers effectively here2. -
Staple Gun
The staple gun is a vital tool for securing your webbing. Using the wrong staples can ruin your work. Choose furniture-suitable staples for a strong hold. For tips on selecting the right staple gun, visit this link3. -
Measuring Tape
Accurate measurements are really important! Several times, I had to redo sections because of miscalculations. A measuring tape helps your rattan fit perfectly in the furniture. Here are some best practices for measuring furniture dimensions. -
Clamps
Clamps are very helpful, especially for big furniture pieces. They hold the webbing in place while you adjust everything, allowing precise work. Explore more about different types of clamps here4. -
Protective Gloves
Protect your hands with gloves! They shield you from splinters and other injuries when handling tools and rattan. This simple step has saved me from many mishaps.
Additional Considerations
Consider adding these items for a better installation:
- Safety Goggles: They protect your eyes from debris when cutting or stapling.
- Ruler or Straight Edge: These ensure straight cuts and even webbing placement.
Tool Summary Table
Here is a quick list of tools needed for rattan webbing installation:
| Tool | Purpose | Recommended Brand |
|---|---|---|
| Scissors/Utility Knife | Cutting webbing | X-Acto |
| Rattan Webbing Stretcher | Stretching and securing webbing | Rattalux |
| Staple Gun | Securing webbing in place | Arrow Fastener |
| Measuring Tape | Measuring lengths accurately | Stanley |
| Clamps | Holding materials in place during installation | Bessey |
| Protective Gloves | Safety while working | Mechanix Wear |
With these tools, you’re ready for a successful rattan webbing project. Preparation is really key! Being ready saves you time and improves the quality of your work. So gather those tools, roll up your sleeves and let’s create something beautiful together!
A staple gun is necessary for rattan webbing installation.True
The staple gun secures the webbing in place, ensuring a strong hold during installation.
Protective gloves are optional when handling rattan webbing.False
Wearing protective gloves is essential to prevent injuries from splinters and tool use during the project.
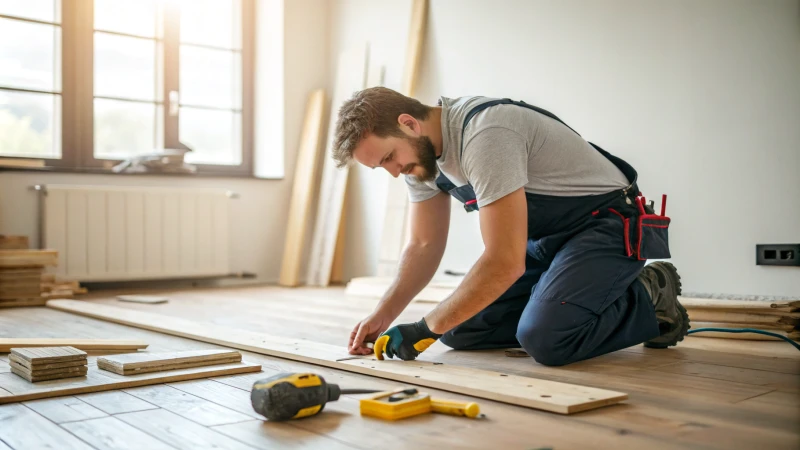
How Do I Prepare the Surface Before Installation?
Preparing the surface for installation is more than just a task; it is the base of a successful project. This part is very crucial. Surfaces must be ready for whatever follows. Let me share how I get surfaces ready.
Before installation, examine the surface for any damage. Clean it very thoroughly with suitable methods depending on the surface type. Conduct moisture tests to check the levels. Provide proper ventilation. This creates the best environment for adhesion and longevity.
Assessing the Surface Condition
Before starting any installation, it is crucial to assess the current state of the surface. This includes checking for any signs of damage, such as cracks, uneven areas, or debris that might cause problems.
Using a level tool can help determine if the surface is even. If not, necessary repairs should be made to create a stable base. For example, filling in stubborn cracks with a suitable filler and sanding down high spots ensures a smooth surface. Small details like this really matter!
Additionally, always remove any loose materials, dust, or dirt by sweeping or vacuuming thoroughly. Tidying up like this really prevents issues during the installation process.
Cleaning the Surface
Once you have assessed and repaired the surface, cleaning is next. Depending on the type of installation, different cleaning agents may be required. For instance, for wood surfaces, using a damp cloth usually works; but for concrete surfaces, a degreaser is vital to remove grime.
| Surface Type | Recommended Cleaning Method |
|---|---|
| Wood | Damp cloth or wood cleaner |
| Concrete | Degreaser or pressure wash |
| Tile | Mild detergent and water |
It is essential to ensure that no residue remains after cleaning as it can affect the adherence of materials during installation. This attention to detail helps in achieving a professional finish.
Moisture Testing
Moisture can significantly impact the longevity and stability of the installed material. Therefore, I always perform a moisture test before continuing with installation. For concrete surfaces, I use a moisture meter to check for excess moisture content.
In case high levels are detected, I allow time for drying or use moisture barriers before proceeding with installation. Maintaining appropriate moisture levels will not only enhance adhesion but also prevent future complications like mold growth.
Ensuring Proper Ventilation
Proper ventilation is very important before starting any installation. Ventilation helps dry residual moisture and allows harmful substances from adhesives or finishes to escape safely. This ensures a healthy environment!
Additional Tips
- Use the Right Tools: Good tools like trowels and scrapers really simplify preparation.
- Follow Manufacturer Guidelines: I always read the manufacturer’s instructions to follow their advice properly.
- Test Small Areas: If unsure about how material will behave on the surface, I test it on a small area first. This method offers insights without risking the whole project.
By meticulously preparing the surface before installation, you set the stage for successful results that meet aesthetic and durability standards. If you’re curious about specific techniques, check installation methods5 for different materials.
Assessing surface condition is essential before installation.True
Evaluating the surface for damage and evenness ensures a stable base for installation, preventing future issues.
Cleaning the surface is unnecessary for proper adhesion.False
Thorough cleaning removes debris and residues that can negatively impact the adhesion of materials during installation.
What Techniques Ensure a Tight and Secure Fit?
Have you ever had trouble finding the perfect fit in your projects? I know this problem very well! Let’s explore some effective techniques that guarantee tight and secure fits. These fits are essential for lasting and functional mechanical designs. They are really important.
A tight and secure fit is crucial in engineering applications. Various fits like clearance, interference and transition are important. Precise tolerances are needed. Machining techniques must be accurate. Understanding these concepts is very important.

Understanding Fits in Mechanical Design
In mechanical design, ensuring a tight and secure fit between components is crucial. There are three main types of fits: clearance fits, interference fits, and transition fits. Each serves different purposes and applications in engineering contexts.
- Clearance Fit: This fit has a small gap between parts, ensuring ease of assembly and movement. It’s often used in applications where parts need to rotate or slide against each other, such as furniture mechanisms that require smooth movement.
- Interference Fit: This type creates a tight connection where parts must be forced together. This is ideal for components that must withstand high loads without separating; interference fits have been particularly helpful in high-load projects.
- Transition Fit: This provides a balance between clearance and interference fits, allowing for some degree of ease in assembly while still maintaining a secure connection. I find this fit really useful for intricate designs.
For a deeper dive into fitting techniques6, check industry-specific guidelines and standards.
Tolerances and Specifications
Tolerances play a key role in achieving the desired fit. They define the permissible limits of variation in a physical dimension. Here’s a simplified table to illustrate common tolerances:
| Type of Fit | Tolerance Range | Application |
|---|---|---|
| Clearance Fit | +0.1 mm to +0.5 mm | Rotating shafts |
| Interference Fit | -0.1 mm to -0.5 mm | Press-fit components |
| Transition Fit | ±0.05 mm | Assemblies requiring precision |
Utilizing precise tolerances ensures that parts fit together perfectly without unnecessary wear or failure. For more insights into tolerance application7, explore technical manuals that detail specifications based on industry standards.
Techniques to Achieve Secure Fits
Achieving a tight fit goes beyond selecting the right type of fit. Consider these techniques:
- Machining: Precision machining can help achieve the necessary dimensions and tolerances, ensuring that parts fit as intended.
- Heat Treatment: For metal components, heat treatment can alter properties to improve fit by expanding or contracting materials; I learned this during a difficult project.
- Surface Finishing: Techniques such as grinding, honing, or polishing can remove imperfections and enhance fit quality significantly; small details make a big difference in the final product.
Explore more on machining methods8 that impact assembly quality and how they can be applied effectively.
Conclusion on Implementation
When implementing these techniques, it’s essential to consider the specific requirements of your project, including load conditions, material types, and environmental factors. By carefully selecting the right approach and adhering to best practices, you can ensure that your components not only fit securely but also perform reliably over time.
For further guidance on best practices in fit design9, consult industry experts or technical literature that focuses on advanced fitting techniques.
Clearance fits allow for movement between mechanical parts.True
Clearance fits create a small gap, enabling parts to rotate or slide smoothly without obstruction, essential for dynamic applications.
Interference fits require no force to assemble components.False
Interference fits necessitate force for assembly, ensuring a tight connection ideal for high-load applications, contradicting the claim.
What Common Mistakes Should You Avoid When Installing Rattan Webbing?
I started installing rattan webbing and soon discovered its beauty. This material truly transforms furniture. Many challenges often appear in the installation process. Common mistakes often hinder progress. Let’s find out how to solve these problems together!
Pay attention to good preparation to steer clear of common errors during rattan webbing installation. Use accurate measurements. Avoid pulling the webbing too tightly. Check for the right environmental conditions. These steps probably lead to successful installation.
When installing rattan webbing, avoiding common mistakes can make a significant difference in the final outcome. Here are some pitfalls to steer clear of:
1. Lack of Preparation
Preparation is very important. My first rattan project went wrong because I didn’t clean the surface. Ignoring this step led to an uneven finish that bothered me every time. Preparing the surface is a game changer. It is really important.
Tips for Preparation:
- Clean: Dust and dirt need removal.
- Sand: Smooth all rough edges for a good start.
- Measure: Accurate measurements help to avoid issues later.
2. Wrong Measuring
A simple measuring error wastes materials. I once cut my webbing too short by not checking numbers twice. Now, I always measure twice before I cut. It really saves resources.
| Step | Description | Tools Needed |
|---|---|---|
| Measure | Use a tape measure to get dimensions | Tape Measure |
| Cut | Cut the webbing with precision | Scissors or Cutter |
| Fit | Ensure webbing fits snugly | None |
3. Overstretching the Webbing
Eagerness made me pull the rattan webbing too tight. This caused it to snap. Seeing hard work unravel due to this mistake is disheartening. Correct tension keeps your project strong. Very tight or very loose tension ruins it.
For insights on this technique, visit webbing tension techniques10.
4. Skipping the Adhesive
At first, I thought adhesive was unnecessary for rattan webbing. I learned skipping this step weakens the bond. Now, eco-friendly adhesives become my choice as they support sustainability and durability.
5. Ignoring the Grain
Rattan’s natural grain adds beauty. Ignoring this detail once made my project lose charm. Following the grain improves looks and increases durability.
6. Neglecting Environmental Conditions
Starting a project on a humid day, I thought weather wouldn’t matter but ended up with warped webbing that spoiled my efforts! I now always check weather conditions before starting projects; timing can change everything! For more insights, check out weather considerations for installation11.
Proper surface preparation is essential for rattan webbing installation.True
A clean and smooth surface prevents imperfections, ensuring a better finish when installing rattan webbing.
Skipping adhesive can lead to a stronger bond in webbing installation.False
Using adhesive enhances durability; skipping it may weaken the bond of rattan webbing over time.
How Can You Best Care for and Maintain Installed Rattan Webbing?
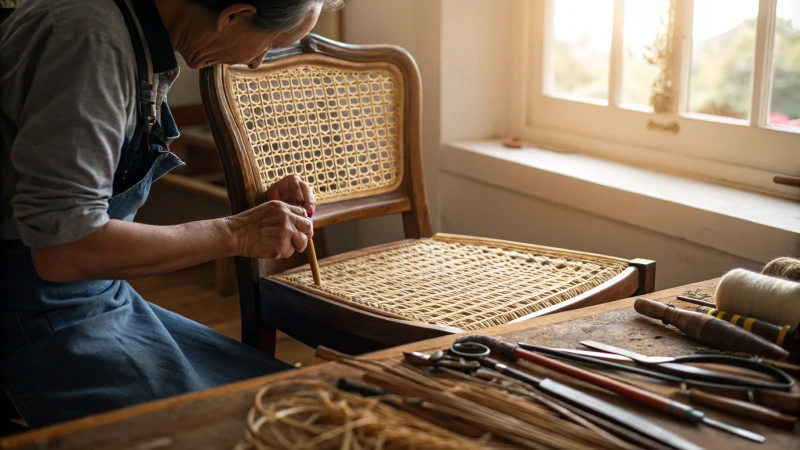
Taking care of your rattan webbing is not just a task; it’s an opportunity to help something stay beautiful. Follow along as I offer my tips to keep your rattan looking bright and inviting for a long time.
Regular dusting keeps your rattan webbing in top condition. Each season, clean it with mild soap and water. Sunlight and moisture can be harmful, so protection is important. Apply natural oils occasionally to rejuvenate the material. Let it shine again!
Caring for Rattan Webbing
Rattan webbing adds a stylish look to my furniture. It holds memories of relaxing times with family and sunny days. A bit of care helps keep this charm alive. Regular maintenance turns my rattan pieces into treasured parts of my home.
Daily Care
A quick dusting routine really helps. Using a soft cloth or a vacuum with a brush, I gently remove dust. This simple action stops dirt from settling into the fibers. My rattan pieces always look fresh.
Seasonal Cleaning Techniques
Each season offers a chance for deep cleaning. Here is my approach:
- Dusting: I take a soft brush and carefully remove dust. Every little corner gets attention.
- Washing: I mix mild soap with warm water. A damp cloth wipes down the surfaces without soaking. Too much water may lead to mold.
- Drying: After washing, I always let the rattan dry completely before using it again. This prevents warping, a lesson I learned the hard way!
Protecting from Weather
Outdoor use demands protection from the weather. This is very important. Here are some strategies:
| Element | Protection Method |
|---|---|
| Sunlight | Use outdoor cushions or covers to shield from direct sunlight. |
| Rain | Bring furniture indoors during inclement weather. |
| Humidity | Place furniture in well-ventilated areas to prevent moisture buildup. |
Rejuvenating Techniques
Sometimes the rattan webbing looks a bit dull. Rejuvenation becomes necessary. Here are some tricks that have worked:
- Oil Treatment: I rub natural oils like linseed or tung to bring back shine.
- Stain Removal: For tough stains, I mix vinegar and water. It works really well!
- Reweaving: If sections start to fray, I consider reweaving or replacing them to maintain the strength of my furniture. Learn more about reweaving12.
Final Thoughts on Rattan Care
Looking after rattan webbing involves regular cleaning, protection from weather, and occasional rejuvenation treatments. Following these practices keeps my rattan beautiful and serves as a reminder of joyful home moments. Find more tips on maintaining other cane furniture types in our guide on cane furniture care.
Rattan webbing requires regular dusting to prevent deterioration.True
Regular dusting helps remove dirt and debris, which can harm the fibers of rattan webbing over time.
Excess moisture can lead to mold growth on rattan furniture.True
Soaking rattan webbing can introduce excess moisture, creating an environment conducive to mold and mildew.
Conclusion
Learn the key steps for installing rattan webbing, including tool requirements, surface preparation, common pitfalls to avoid, and maintenance tips for lasting beauty.
-
Discover the essential tools needed for rattan webbing installation to ensure a successful project. ↩
-
Explore best practices and techniques related to rattan webbing installation to enhance your skills. ↩
-
Learn about safety measures while working with rattan webbing to protect yourself during installation. ↩
-
Find out about different types of clamps that can assist in securing rattan webbing during installation. ↩
-
Clicking this link will provide you with expert tips and techniques on surface preparation that are essential for successful installations. ↩
-
This link offers detailed guidance on fitting techniques crucial for mechanical design, helping you implement effective strategies. ↩
-
Explore this resource for comprehensive information on tolerances and their applications in achieving precise fits. ↩
-
Learn more about advanced machining methods that can significantly affect component assembly and performance. ↩
-
Find expert advice on best practices for fit design, enhancing your knowledge for optimal performance in projects. ↩
-
Discover essential tips on measuring and cutting rattan webbing accurately to avoid errors during your project. ↩
-
Learn about the impact of environmental conditions on rattan webbing installation to ensure longevity and durability. ↩
-
Explore expert advice on maintaining rattan webbing for longevity and beauty. This resource offers practical tips tailored for both new and seasoned users. ↩
